

Happy Cinco de Mayo! If you’ve ever seen these sweet buns in Latin American bakeries (big flat buns with pretty colored toppings and neat designs swirled into the top), like me, you may have wondered how on earth they were made to look that way. And if you’re like me, you probably bought several, ate too many, got a stomachache – and then wondered if you could make them yourself!
Conchas (the word means “shells” in Spanish) are lightly sweet yeast buns with a layer of sweeter, flavored dough on top. It’s kind of like the buns are iced before they’re baked. I found a basic recipe for conchas and doctored it up using some Hodgson Mill White Whole Wheat Flour to make them a little healthier.
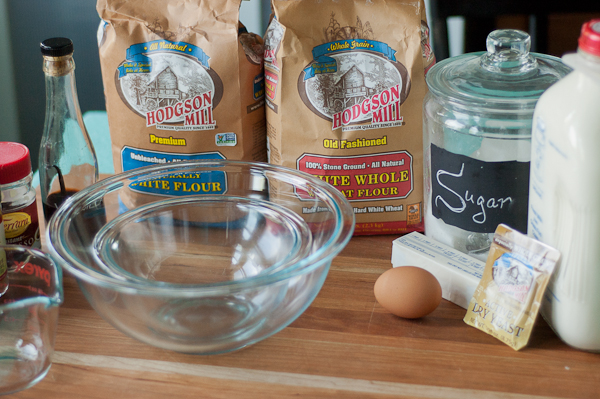
I’ve started using white whole wheat flour in just about everything lately, and wondering where it’s been all my life. For some reason I used to pass it up in favor of Graham or whole wheat flour. But white whole wheat flour has a subtle whole wheat nuttiness, which you might prefer for some recipes, yet it still gives baked goods so much more body and better taste than using only all-white flour.
Stick with me – I have a lot of instructions, because making conchas is kind of two recipes in one, but don’t worry – the process isn’t difficult.
First, mix up the dough, and knead it until it’s smooth. This is a perfect time to practice recognizing when to let dough rest like I talked about last week with Asiago Cheese Bread. As I was kneading this dough it started getting tighter and firmer until I could barely stretch it to fold it in half.

After walking away and letting the dough rest for a few minutes, I came back and it was much smoother and more relaxed, and I could knead it some more until the outside was smooth. Look at the difference between the photo above and the one below.

Pretty cool, huh? Put this well-kneaded dough in an oiled bowl, cover it, and let it rise until doubled.
Meanwhile, make the sweeter, flavored topping dough. Make the basic vanilla-flavored dough, then divide it into three equal portions, place in separate bowls, and make each portion a different flavor – I chose vanilla, cinnamon, and chocolate, but you can also make other flavors like orange or strawberry.

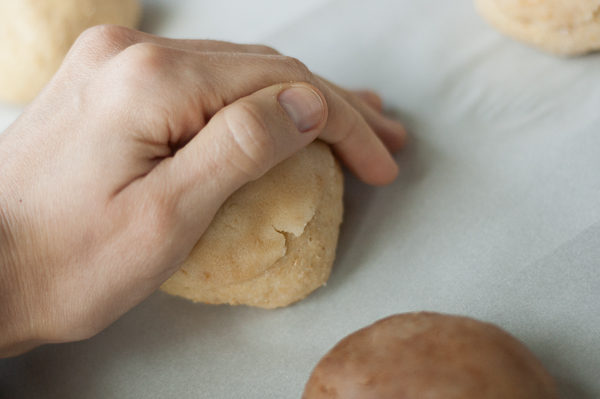
Once the main dough has risen, punch it down and knead it for another quick minute, then it’s time to shape it. Using a serrated knife, divide it into 12 equal portions and shape these into balls.

I like to flatten the ball of dough slightly, grab two opposite sides and pinch them together on the bottom, stretching the top of the bun. Then I repeat the pinching and stretching on the two remaining sides. It makes a nice smooth round bun with a pinched seam at the bottom.
Place these buns at least 3 inches apart on lightly greased or parchment paper-covered baking sheets. Take the flavored topping dough you made and cut each ball into four portions so that you have 12 portions to match the 12 buns. Now, take each piece of flavored topping and flatten it, pinching and squeezing between your palms, until it’s big enough to cover the bun.

Pat and drape it onto the bun until it sticks smoothly.
Now take a sharp knife, and cut lines or designs into the topping dough, but not into the dough beneath. You can do curving parallel lines like a seashell or spirals or cross-hatches.

Cover these nearly finished buns with plastic wrap and put them in a warm place for a second rise. Pop them in the oven, and then enjoy!

With a little patience you can have these beautiful, lightly sweet yeast buns on the table for your family or for a Cinco de Mayo breakfast or celebration this weekend.
Cinco de Mayo Conchas
Adapted from Food.com Conchas
Dough
1 package Hodgson Mill Active Dry yeast
1/2 cup warm water
1/2 cup lukewarm milk
1/3 cup butter (melted into ½ cup milk, above)
1/3 cup granulated sugar
1 teaspoon salt
1 large egg
1 1/2 -2 cups Hodgson Mill White Whole Wheat Flour, divided
2 cups Hodgson Mill Naturally White Flour
Oil or cooking spray to grease bowl
Flavored Topping Dough
1/3 cup granulated sugar
1/4 cup butter or margarine, softened
1/2 cup Hodgson Mill Naturally White Flour
1 teaspoon vanilla extract
1 teaspoon cinnamon
1 1/2 teaspoon cocoa
1/2 teaspoon instant espresso powder
Mix yeast, warm water and a pinch of sugar in a large bowl. Let sit 5 minutes until bubbly and smelling like rising bread. Meanwhile, warm milk and butter together until butter is melted and mixture is warm (about 100° F.) Add milk mixture, salt, sugar, eggs, and 1 1/2 cups Hodgson Mill White Whole Wheat flour to yeast, and mix until smooth. Add 2 cups Hodgson Mill Naturally White flour, and mix again until dough forms and it becomes difficult to stir.
Turn dough onto a lightly floured surface (I like to use white whole wheat to flour the surface) and knead 5 minutes, until smooth and somewhat elastic. (It will be less stretchy and grainier than all-white flour dough.) Dough may be tacky and sticky. Add small amounts of white whole wheat flour (up to ½ cup more) as needed to handle the dough. If dough seems chunky and doesn’t want to be kneaded, let rest 5 minutes to let gluten relax and then knead 1-2 more minutes until smooth.
Oil a large bowl with spray or vegetable oil, turn dough to coat it with oil, cover and let rise in a warm draft-free place about 1 1/2 hours, or until doubled.
Meanwhile, make the flavored topping dough. With an electric mixer, beat sugar and butter in medium bowl until fluffy. Add flour and vanilla extract and beat until combined. Consistency will be crumbly, and grainy, but crumbs come together into a smooth, sticky dough when gently kneaded. If it doesn’t, add a drop or two more of vanilla extract or some milk and gently knead together again until smooth and slightly sticky.
Divide topping dough into 3 equal portions and place in separate bowls. In one portion, add cinnamon and knead until combined. In another, add cocoa and espresso powder and knead until combined. Leave vanilla plain, or see notes below for more flavor options. Roll these flavored, toppings into 3 separate balls, and cover tightly to prevent hardening.
When main dough is done rising, punch down and use a serrated knife to cut into 12 portions. Shape these into slightly flattened balls and place them 3 inches apart on a greased or parchment paper-covered baking sheet.
Take flavored topping dough balls – divide each ball into 4 pieces, so there are 12 total portions. Pinch and flatten these portions gently between your palms and drape and pat them over the buns until they cover most of the bun and stick firmly. Use a sharp knife to cut grooves through the topping down to the dough beneath, like a swirl, or curving parallel lines like a seashell, or a cross-hatch. Cover sheet with plastic wrap and let rise in a warm place 45 minutes or until about doubled.
Preheat oven to 350° F. Bake 13-15 minutes, checking often after 13 minutes. Finished buns should be very lightly browned, topping no longer appears wet, and the buns will sound hollow when tapped gently on the side. Enjoy warm or at room temp.
Notes: Makes 12 buns. Lasts 2-3 days when kept tightly covered in a cool place. For orange-flavored topping dough add 1/2 teaspoon orange extract, or for strawberry add 1/2 teaspoon strawberry extract to topping dough, just after gently kneading and dividing into 3 portions.

Leave a comment